Showing posts with label traxfactory. Show all posts

Thursday, September 4, 2025

Changing your brake pads on your mountain bike


The two videos attached, show the process, one with a Shimano system the other with a SRAM.

I created the two videos below to show you how it's done.  

Watch the video and read the instructions below carefully before starting the process on your own.  Do the work on your own bike and finish with a feeling of accomplishment. The process is pretty simple. Just take your time. 


So, you're ready to hit the trails, but before you do, it's essential to ensure your mountain bike's brakes are in top condition.

 I’ll walk you through the step-by-step process.

First things first, gather your tools and a set of compatible brake pads for your bike.

I’m using the TraxFactory Stomper Compound pads. These pads are high quality and made for numerous braking systems, including Magura, SRAM, Hayes, and Shimano. Check the website for the make and model of your brakes to ensure you get the right set of pads. 


Step 1: Gather Your Tools

Before we begin, make sure you have all your tools ready: new brake pads specific to your bike's brake system, Allen keys or screwdrivers, a rag or paper towel, rubbing alcohol or brake cleaner, a small brush, and pliers if needed.


Step 2: Remove the Wheel, this is optional depending upon how easy or hard it may be to get to your brake pads. 

I  will start by removing the wheel, in this case the front wheel for the example,  to give yourself more space to work. This step is not always necessary but can make the process easier.


Step 3: Remove the Old Brake Pads

Locate the brake pads and the retention mechanism. It could be a bolt or pin.

Use the appropriate tool to loosen and remove the retaining hardware.

Slide out the old brake pads from the brake caliper.


Step 4: Clean the Brake Caliper

The caliper may need to be pushed back, to allow the pads, now thicker being they are new.  Use a plastic tire lever to ease them back without damaging them. “Do not use a metal tool of any kind” or a screwdriver, as this could damage the caliper and piston(s). 

Keep the new pads clean and avoid touching them with your hands as the oils in your skin can contaminate the pads, not allowing them to perform their best.  Some type of rubber glove with help from the oils from your hand touching the new pads. 


-Clean the brake caliper thoroughly using rubbing alcohol and a small brush. Remove any dirt, oil, or debris that could affect braking performance.


During this entire time when the pads have been removed, DO NOT squeeze the brake lever on your handlebars! 


Step 5: Install the New Brake Pads


Take your new brake pads and insert them into the brake caliper.

Make sure to keep the spring attached to them, that is how the pads return to their position after applying. 


Ensure they are correctly positioned and align with the braking surface.

Reinstall the retaining bolt or pin to secure the new brake pads in place.


Step 6: Adjust if Necessary


Check the alignment of the brake pads with the rim or disc rotor.

Make any necessary adjustments using the adjustment screws on the brake caliper to ensure even contact.

To recenter the pads after installation, loosen the brake housing, then while applying the brake, tighten the housing bolts down. 

Let go of the brake lever and the pads should now be centered on the rotor. 


Step 7: Reinstall the Wheel


If you removed the wheel, securely reinstall it onto the bike.


Step 8: Test the Brakes


Squeeze the brake lever to test the brakes.

Spin the wheel and check for any rubbing or uneven braking.

Make further adjustments if necessary to optimize brake performance.


Step 9: Bedding-in Process (Optional but Recommended)


Optionally, go for a gentle ride, applying the brakes lightly to allow the new pads to bed into the rotor surface.


Step 10: Final Checks


Double-check all bolts and pins to ensure they are tightened securely.

Verify that the brake pads are clean and free from any contamination.


And there you have it! You've successfully changed the brake pads on your mountain bike. Now you're ready to hit the trails with confidence.


Follow these simple instructions for the other set of brake pads and you’re done.  


Make sure you do some research and find out the best pads, size shape and material to fit your brake system. 


Wednesday, December 1, 2021

Hacker’s top 7 for 2021, a holiday gift guide


Hacker’s top 7 for 2021 


I have compiled a short list of awesome products for the holiday’s. Not only would it be great to get any of these as gifts, but think also about those hard to find gifts for athletes. There may be a few on this list that could help you decide what to get them. 


Swonder Direct inflatable Stand Up Paddle Boards

From Dec. 1st to Dec. 20th use the code “Tim30” and get 30 percent off your iSUP 

Swonder Direct purchase. 

Act fast!  Get out on the water on your own paddle board. 

www.swonderdirect.com


Trax Factory makes the Sweat Buster and HOT SHOCKEE  

www.traxfactory.com


KINeSYS sunscreen,  not only to be used in the summer, but year round for skin protection from the sun. 

www.kinesysactive.com


Orange Mud hydration packs. Great for hiking, running and mountain biking. 

www.orangemud.com


Arctic Cool Gear with HydroFreeze Technology.    Not only great for outdoor workouts keeping cool but I have used them for indoor workouts too, wearing the shorts and shirts. The sweat wicking fabric keeps me cool doing indoor training cardio sessions as well as weight workouts. A must have for any athlete. 

They also make a sleepwear to keep you cool during the hot summer months.

www.arcticcool.com


Teeter Inversion Table —  I’ve used the Teeter and it is helping me with my migraine headaches as well as just making me feel good and improving my posture. 

www.teeter.com


Terra Core Fitness

Add a whole new dimension in your home workouts. There is no need to belong to a gym, when you can workout in the comfort of your own home using the Terra Core and Terra Glide.  I’ll be doing more videos on these sweet products soon.  Keep tuned, and subscribe to my channel so you don’t miss out.

www.terracorefitness.com


Tuesday, January 10, 2017

TraxFactory’s Hot Sockee’s, Keep Your Toes and Feet Warm

Keep your toes warm inside your cycling shoes.


There is nothing worse than being cold, let alone your feet or toes. Hot Sockee’s are the answer.  They really don't take up that much room inside your shoe. Thinner than wearing an extra pair of socks and just like socks, the neoprene is washable.  I would not place in the dryer but let air dry. 


Winter rides are here and heres the perfect way to keep your toes from getting cold while out riding. 
I am not a fan of cycling shoe covers, they seem to be a hassle to put on. If you like to switch up your riding from road to mountain bike trails, you have to purchase a separate set of covers for each type of riding shoe. Not so with TraxFactory’s Hot Sockee’s. These neoprene foot/toe covers slip on over your sock, then you slide your foot into your road cycling or mountain bike shoe and your off. They allow your feet to breathe yet keep out the drafty air rushing through the front of your shoe. Order the correct size for your shoe size. They will extend from the tip of your toes to about just past your foots arch. 

Tuesday, April 19, 2016

Keep Sweat from Dripping in Your Eyes this Summer!


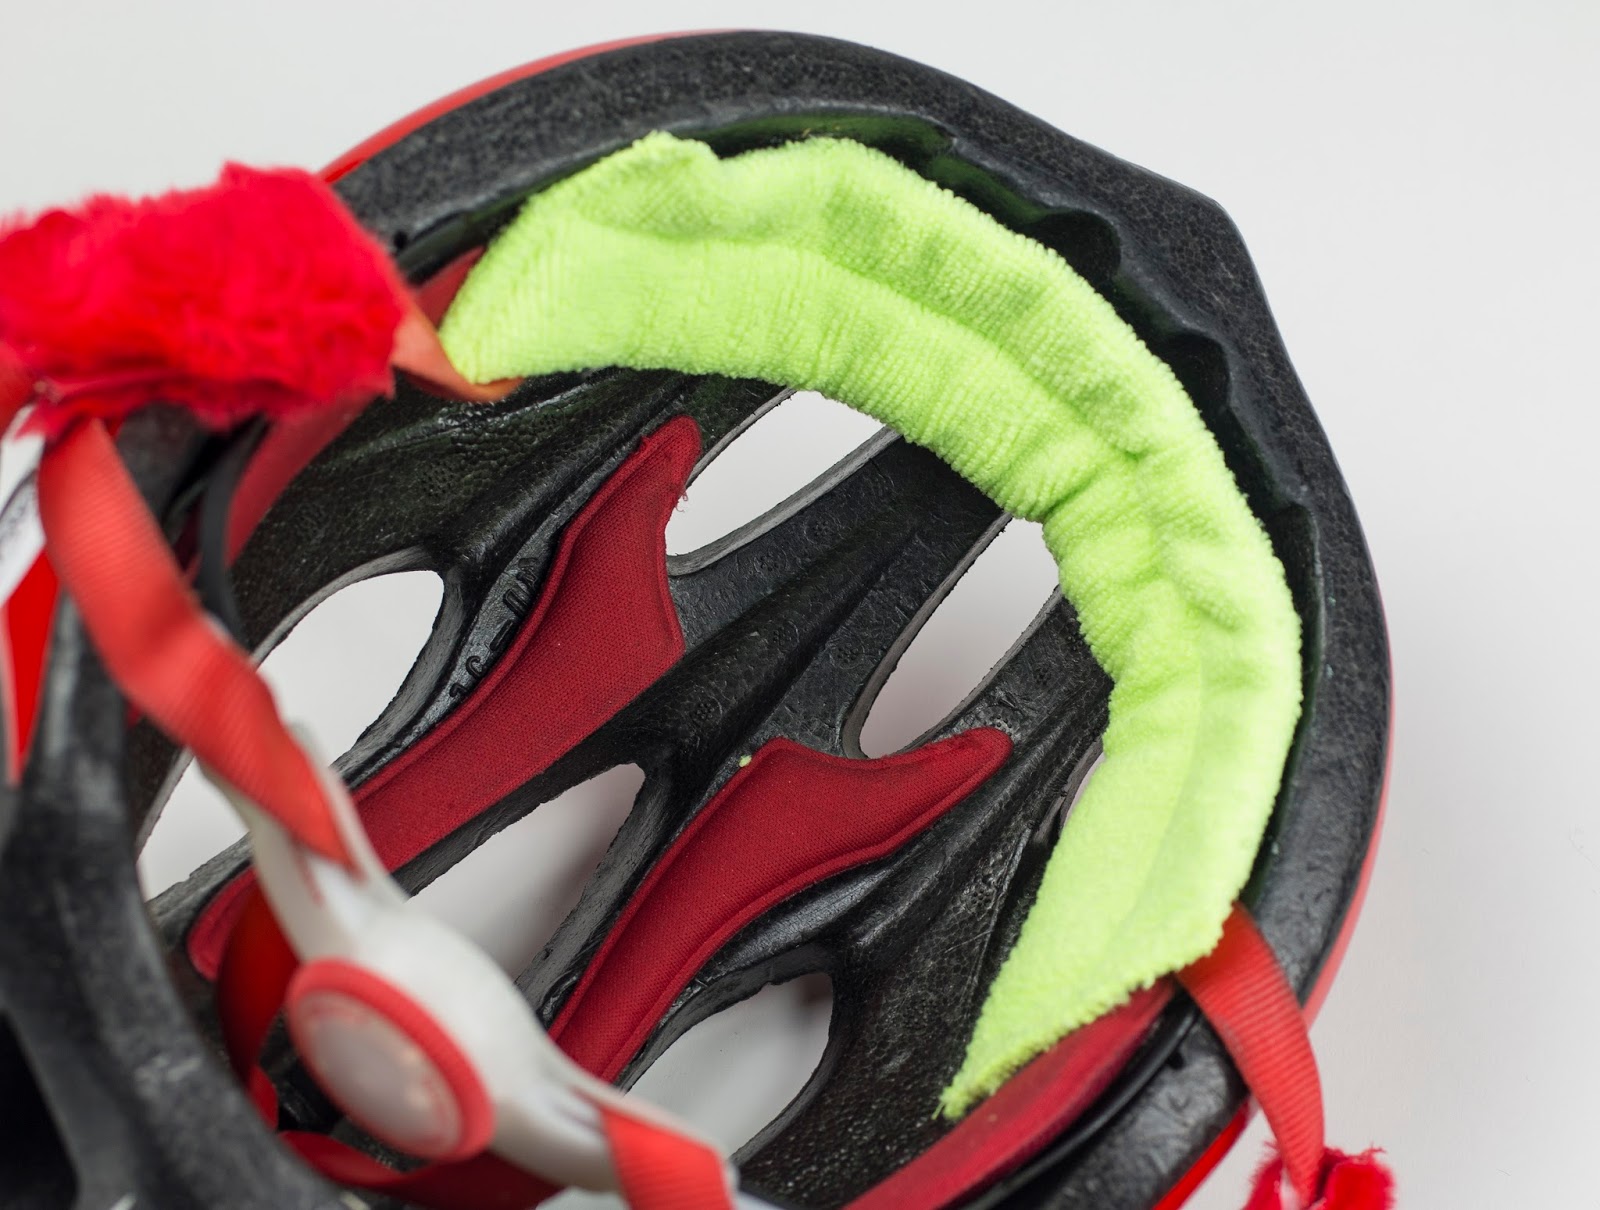
The Sweat Buster replaces your old pad(s) and sits right under the lip of the helmet.
Before removing the old pads to install the Sweat Buster
Everything you need for installation comes with the kit. 
Four small Velcro circles hold the Sweat Buster in place. 


Summer is just around the corner.  Here in Arizona it means hotter temperatures, even when the sun is not up.  Sweat is not normally a problem, as it tents to dry pretty fast as you move through the air. Until you are forced to stop at a red light, then it's like a fire hose filled with water drips down my face. To stop sweat from dripping down my face or down my sunglasses I have installed the super awesome Sweat Buster from TraxFactory.com.  Getting sweat in your eyes makes it pretty difficult to keep your eyes on the trail or road. Installing the Sweat Buster is super easy to swap out your old bike helmet pads, inside, and replace them with the Sweat Buster. The 10 and 1/2 inch super absorbent microfiber pad will do the trick. The pad hides just inside the lip of your bike helmet and is held in place with four small Velcro circles. Being stuck only with Velcro, the pad can be removed and washed anytime. The pad is small enough not to interfere with the air vents in the front of your helmet so the vents on the front of your helmet will still be keeping you cool while moving through the air. Every so often I throw the pad in the laundry with my cycling gear, which I don't use fabric softener with, as it takes wicking properties away from the microfiber pad, and lessens the life of your Spandex gear. I am not a fan of wearing a cap or anything else under my helmet when I ride, so the Sweat Buster is the perfect answer for soaking up sweat before it ends up on my sunglasses.